Arctic Cat Snowmobile Choke Lever
Snowmobile Choke
Bill of Materials
- A small spring is need, which could be salvaged from a broken choke
- A zip tie to hold on the actual lever to the inner tube
Tools needed
- MOST Delta RepRap or similar RepRap 3-D printer
- 3/4" - 16 tap and die
Skills and knowledge needed
- Some skill of how to properly use a tap and die will help, however the plastic cuts nicely and shouldn't be a problem for even an inexperienced user
- 3D Printing and 3D Modeling
Technical Specifications and Assembly Instructions
Printing
- To make dimensional changes open and edit in OpenSCAD
- Slicing Instruction
- 50% fill
- Add support to the lever on the beveled end
- Layer height = 0.10 mm
- Speed = 70 mm/s
- Print time will be about 2 hours if all pieces are done together
- Link to Thingiverse with scad and stl files.
[|http://www.thingiverse.com/thing:1183629]]
Assembly
- Using 3/4" - 16 die cut threads onto cylinder on main tube
- Using 3/4" - 16 tap cut threads into the nut.
- Ensure pieces thread together nicely when done
- Place spring onto the inner tube and slide into the main tube.
- Place nut onto threads of main tube
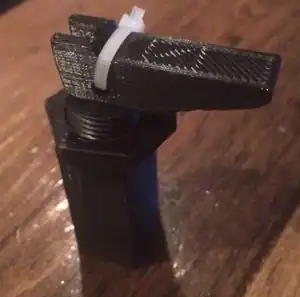
- Pull inner tube through cylinder in main tube, place lever over and slide zip tie through to hold on lever
Common Problems and Solutions
- Incorrectly taping the threads will be the biggest problem someone would occur
Cost savings
- Cost to make = $0.33
- Cost to buy = $4.99
- Savings total $4.66 which is a percent savings of 93.4%
This article is issued from Appropedia. The text is licensed under Creative Commons - Attribution - Sharealike. Additional terms may apply for the media files.