CSU Research Competition 2025 2nd place trophies
Introduction
This page describes the process used to create the 2nd place trophies for the 2025 Student Research Competition from start to finish, including background, problem statement, criteria, prototyping, final design, construction, bill of materials, operation, maintenance, and a step-by-step instructional video.
Background
The need for 2nd place plaques came from the annual CSU Student Research Competition taking place at Cal Poly Humboldt, located in Arcata, California, for the first time in 2025. Due to the connection an engineering professor, Lonny Grafman, had to those who ran the competition, he was able to get an Into to Design class to make the trophies. This led to a group of four students, Caden Amaya, Connor Judd, Paola Mendez, and Iris Perla-Blanco, making a total of twenty 2nd place plaques, since there are a total of ten categories and a graduate and undergraduate award winner for each one over the Fall semester of 2024.
Problem Statement
The objective of this project is to create twenty unique and memorable awards that represent the school Cal Poly Humboldt for the 2nd place winners of the 2025 CSU Student Research Competition.
Criteria
This table illustrates the criteria used to make design decisions based on the considerations, specifications, and limitations communicated from the client....
| Criteria | Description | Weight (1-10) |
|---|---|---|
| Durability | Can last a minimum of ten years before any kind of breakdown or wear occurs | 8 |
| Cost | The project materials and labor costs cannot exceed $200 from the client and $75 from each team member. ($500 total) | 10 |
| Size/Shape | Should weigh no more than, "a gallon of milk" and be an appropriate size, which was specified as smaller than a 10-inch by 10-inch frame. | 5 |
| Portability | Recipients of these awards are likely to be traveling large distances, meaning the awards need to be compliant with TSA guidelines. | 7 |
| Representative | The award should represent the school of Cal Poly Humboldt, meaning it is well made and has a design that reflects Humboldt County. | 8 |
Prototyping
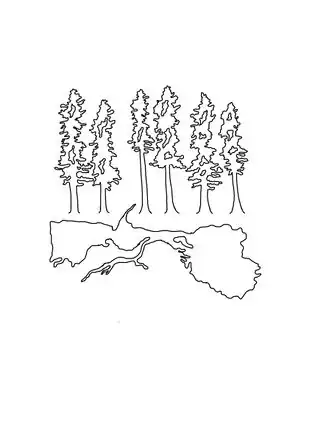
Before beginning any prototyping, the choice was made to make the award a plaque due to the quantity of awards needed. The prototyping was focused on the aesthetic side of design and additional testing of the machines and materials that could be done incorrectly. To start the prototyping, each team member made a depiction of the design they had in mind out of cardboard, shown in Figure 1.0. The design chosen to continue with was the second on the left that has a stand and taped edges. After further narrowing our design choices the design was recreated using CAD software shown in Figure 1.1. In order to decide which font style/ label design to pick, a total of 7 different alternatives were made. By conducting interviews with professors and students on campus, it was generally agreed design numbered: 1 in Figure 1.2, would look the best. The testing side of prototyping can be seen in Figures 1.3 and 1.4, where we tested how the design would look after being engraved and how the resin would cure.
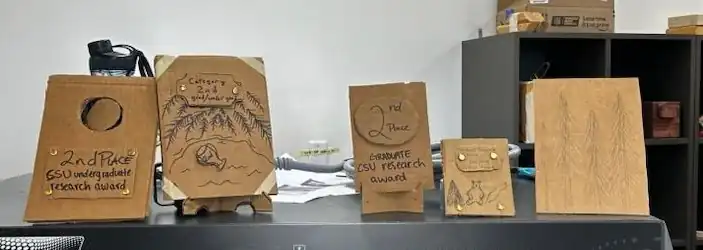 Figure 1.0 - Cardboard Prototypes
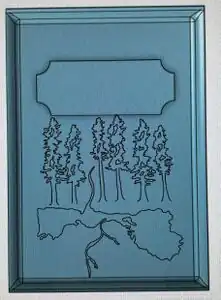 Figure 1.1 - Upgraded CAD Design
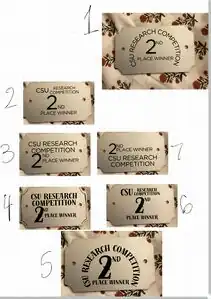 Figure 1.2 - Font Prototyping
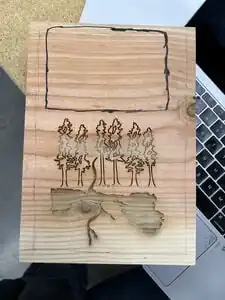 Figure 1.3 - Testing Laser Engraving
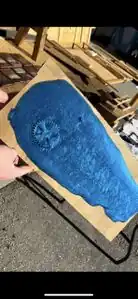 Figure 3.4 - Testing Resin
Final Product

The final product is a detailed plaque made from Douglas Fir, anodized aluminum, resin, and a picture frame hangar. The plaque also represents Humboldt through the engraved design. The award serves as a reminder for the amazing research work done by the recipients of the awards in their respective categories.
Construction
To construct the plaque we used Douglas Fir slabs, plywood, resin, pigment, aluminum, screws, and picture frame hangars. The Douglas Fir slabs started as 2, 8ft x 10in x 1.25in, but after being milled, planed, and cut there were a total of 20, 7in x 10in x 0.75in rough slabs for the plaques. Figures 3.0 and Figure 3.1 show the boards transformation during this process. In order to make the aluminum placards, a 1/8-inch-thick slab of aluminum was cut into strips, drilled in order to the make filleted edged, and cut again into individual pieces; Figure 3.2 shows this process. Next, the placards were anodized by cleaning the surface of the aluminum with soapy distilled water and left to sit in a mixture of water and lye to create an aluminum oxide layer. The placards were then dunked into an electronically charged bath of sulfuric acid, which solidifies and hardens the oxide layer, shown in figure 3.3. After which, the pieces were neutralized in a baking soda and water mixture and boiled to remove any leftover particulates from the anodizing process. This whole process was done in order to make the placards look like silver to indicate 2nd place, as can be seen in figure 3.4. Next the aluminum pieces were engraved with "2nd Place Winner CSU Student Research Competition" and secured to the plaque simply using screws. The slabs were then darkened using the wood stain, routed on the edges to clean up the blocky shape, and engraved with the design chosen of Redwood trees and the Humboldt Bay, shown in Figure 3.5. The steps required before engraving are drawing it up by hand, remaking it digitally, and sending the digital file it to a laser engraver. The second to last next step of the plaque was to mix together the gallon of resin, the gallon of resin hardener, and the blue pigment powder, then squeeze the mixture into each engraved section of the Humboldt Bay using syringes to ensure the resin stayed within the bounds of the bay. Additionally, squidging the surface to ensure a smooth finish, shown in figure 3.6. Finally, the sawtooth picture frame hangars were screwed onto the back of each plaque, leaving 20 completed 2nd place awards.
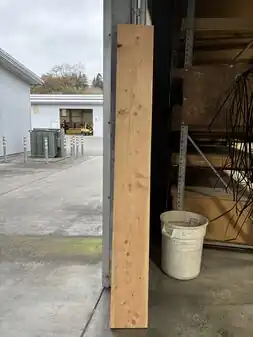 Figure 3.0 - Douglas Fir Plank
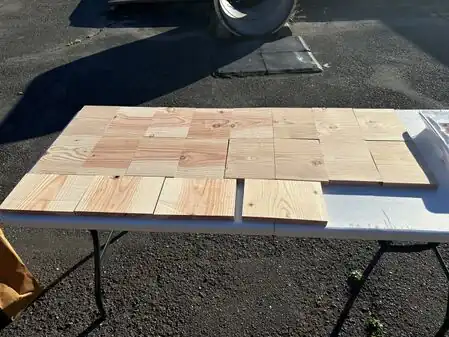 Figure 3.1 - Cut Slabs
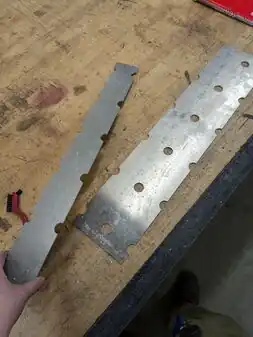 Figure 3.2 - Cut and drilled Aluminum
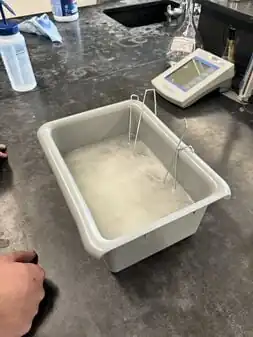 Figure 3.3 - Anodizing Process for Aluminum
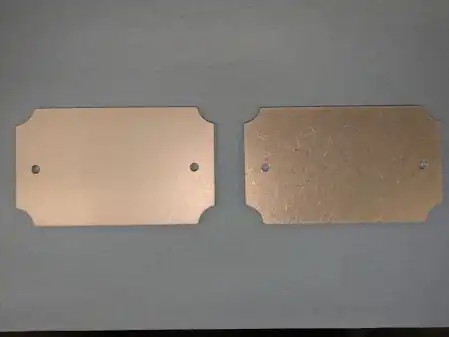 Figure 3.4 - Anodized Aluminum
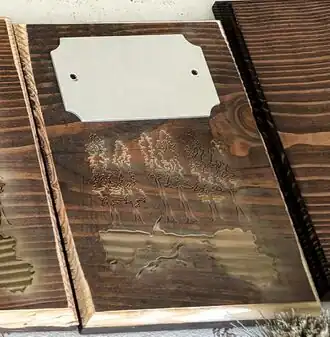 Figure 3.5 - Plaque after being stained, routed and engraved
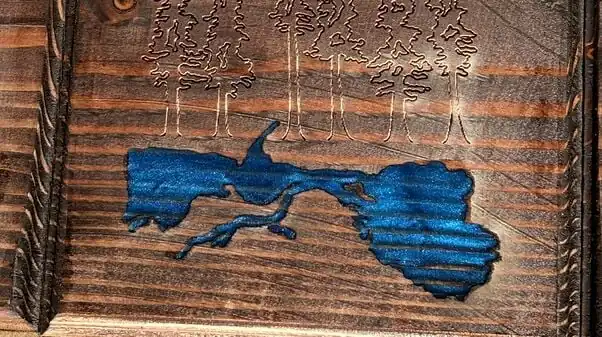 Figure 3.6 - Resin Pour Results
Video Instructions
Bill of Materials
The following chart shows a complete bill of materials used during the prototype and construction processes. Not all items listed were used but were still bought and therefore part of the bill of materials. Additionally, any items marked with a cost of USD 0.00 were donated or available for use from the makerspace room available for the ENGR 205 class to use.
| Item | Amount | Cost per unit | Total |
|---|---|---|---|
| Almquist Lumber — 8ft x 10in x 1.25 in Douglas Fir Slab | 1 | USD 32.00 | USD 32.00 |
| Lumber from Rob — 8ft x 10in x 1.25 in Douglas Fir Slab | 1 | USD 20.00 | USD 20.00 |
| Pacific Blue Epoxy Resin Pigment — 50g | 1 | USD 14.99 | USD 14.99 |
| Resin Tape — Single Roll | 1 | USD 8.99 | USD 8.99 |
| Clear Epoxy Resin & Hardener — 1 Gallon of each | 1 | USD 99.99 | USD 99.99 |
| Crystal Drain Black Lye — 1 Gallon *Used for anodizing | 1 | USD 0.00 | USD 0.00 |
| Sulfuric Acid — 1 Gallon *Used for anodizing | 1 | USD 0.00 | USD 0.00 |
| Aluminum Sheet — 12in x 48in x ⅛ in | 1 | USD 0.00 | USD 0.00 |
| Polyurethane Water Based Spray — 11.25 Ounces | 1 | USD 16.55 | USD 16.55 |
| 5 Gallon Bucket — HDPE | 3 | USD 4.99 | USD 14.97 |
| Syringes — 3 Count *Used for Resin | 1 | USD 8.54 | USD 8.54 |
| Sawtooth Picture Frame Hangers — 50 Count | 1 | USD 4.99 | USD 4.99 |
| Stain — * Used to darken wood | 1 | USD 15.43 | USD 15.43 |
| Grand total | Cost::USD 236.45 | ||
Operation
There are only two possible ways to "operate" the plaque: To hang it on a wall and to use the stand. The video above explains how to correctly use the stand, so the following directions are for hanging it up.

Find a location you'd like to hang-up the plaque, then using a stud finder (if possible) and a pencil, find the nearest stud to that spot and mark the height you'd like the plaque to hang from with the pencil. If you do not have a stud finder, just make sure not to hammer the nail into any electrical or plumbing utilities that may be present in the wall.
Hold the tip of the nail up to your mark, give it a little tap with a hammer to get it in place and take your hand away. Now all that's left is to hammer it in and hangup your plaque.
Maintenance
As all things, even a plaque requires some level of upkeep. Fortunately, not much. All you will need a duster or alternative product like a microfiber cloth, and after a long period of time some wood varnish may take off some of the wear that occurs over time. The dusting can be done by anyone, but the varnish should not be done by an unaccompanied child since some of the ingredients could be harmful depending on the varnish
Maintenance Schedule
- Daily
- Requires no daily upkeep
- Weekly
- Give the plaque a good dusting, only takes a minute or two
- Monthly
- Requires no Monthly upkeep
- Yearly
- Requires no yearly upkeep
- After 10 years
- Clean the surfaces of the plaque and apply varnish with a brush; do multiple coats. Different varnished can vary in application, so be sure to check the instructions on the varnish.
Conclusion
Testing results
To get an outside perspective on the working design, and test how well it would be received, the team conducted multiple interviews with other students and professors on campus. The main questions asked were first impressions, if they felt it accurately represented Humboldt, if it was too big or too small, if there was any improvement they would like to see, and overall, how they would feel about receiving it as an award. The results were all fairly unanimous; everyone interviewed agreed that they felt the award represented Humboldt well and that they would be happy to receive it as an award, as it has been a paper award in past years. The only suggestion that came up more than once was about the plaque being possibly too big.
Other kinds of testing done during the construction and prototype process, like testing the laser engraving and resin all had positive results that allowed for the plaques to move onto those steps without encountering an issue.
Discussion
Although the results of the interviews were almost all positive, some of the interviewees had suggested making the plaque smaller. It was discussed and ultimately decided that context for how elaborate the 1st place award was left out, and a slightly larger than average plaque suits this particular award.
Lessons learned
The most overarching lesson learned is to prototype and test everything. Although most steps required to make the plaques were tested before-hand, there were a couple of problems that slowed down the process. The first lesson learned was to test the engraving on not just the wood, but the aluminum too. The laser used was able to engrave the wood well, however the wavelength was too broad to engrave aluminum, meaning outside resources needed to be found in order to complete this step. The other lesson learned was to use make smaller batches of resin. Although the set time of the resin was tested the process ended up taking longer than anticipated and ended up in the resin being harder to work with as it started to set. The last lesson was to add pressure when letting wood stain sit; without pressure and a sheet of paper separating the plaques, the wood will warp while drying.
Next steps
The 2025 CSU Student Research Competition ceremony is going to take place during the spring semester of 2025, which is when the plaques will be awarded to the 2nd place winner for the graduate and undergraduate categories. Until then, the plaques will either be packaged up and stored, or put out on display somewhere on the Cal Poly Humboldt campus.
Troubleshooting
| Problem | Suggestion |
|---|---|
| Nail keeps bending | Make sure you are not hammering into utilities; it is
recommended to stay at least 6" away from outlets. If not, make short, controlled swings and try to hit the head of the nail straight on |
| Can't hang plaque on Nail | The head of the nail should not be touching the wall,
but very close in order to leave a space for the frame hangar to catch the nail. |
Team
- Caden Amaya
- Connor Judd
- Paola Mendez
- Iris Perla-Blanco