Monochromator
Adjustable Monochromator. A monochromator is a device which takes light and transmits it to into a narrow band of wavelengths. Using a form of mechanical filtering (diffraction) the user is able to select a specific wavelength (color) which would exit through a exit slit. The monochromator holds many scientific applications ranging from measuring a reflected or transmitted light off a surface. By branching two assemblies together, one can produce a excitation wavelength aiming at the second which can analyze the emitted light.
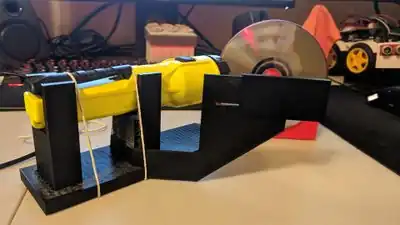
The basis of this project was derived from a early project Bproman and Ajrettig developed based around making an affordable piece of lab equipment. The design used a whole CD which was fixed, thus causing it to struggled to focus the wavelength and the exit slit had to be set manually by sliding a printed shroud. This design used the previous concept with an addition of a rotating reflective surface which aims the wavelength to an exit slit which can be finally adjusted to a desired wavelength.
New Design:
Bill of Materials
Tools needed
- MOST Delta RepRap or similar RepRap 3-D printer
- M3 Metric Short Arm Allen Wrench
- Utility Knife -
- LED Flashlight -
Skills and knowledge needed
Technical Specifications and Assembly Instructions
Parts (Qty 1 for all)
- Body2
- Body Cover
- Light Slit Left
- Light Slit Right
- Light Reflector Gear
Printing
- Material: PLA or Equivalent
- Support: None
- Layer Height: 0.2mm
- Printer Speed: Varies based off Model, choose a speed in order to give best print quality
- Print Temp: Choose based off material selection for best print quality
- Specific Part Instruction:
Gears
- Density: 100%
- Walls: 4
Rest of Components:
- Density: 15%
- Walls: 2
Estimated Time - 7 hrs
Installation
Estimated Time - 30 min
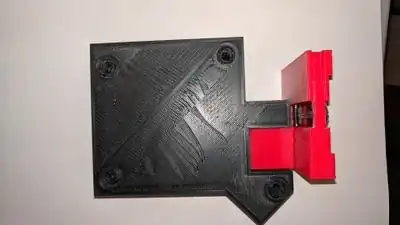
- Take Left and Right Slit, using 3M 8mm screws attach a box cutter blade to each of the components. See Picture below
- Using a 3M 25mm screw feed it through the hole located on the side of the Right Slit part.
- Place the pen spring over the screw
- Using the guiding rails, secure the left and right slit. (do not over tighten as this is your calibration screw for the the slit thickness)
- Carefully using a sharp blade, cut a small reflective piece out of a CD
- Glue the reflective surface to the tab on the larger gear. See picture below for arrangement.
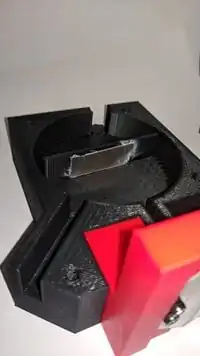
- Place the gears on their respective shafts of the body component, these should be loose enough to still allow rotation. Clean up as needed based off printer quality.
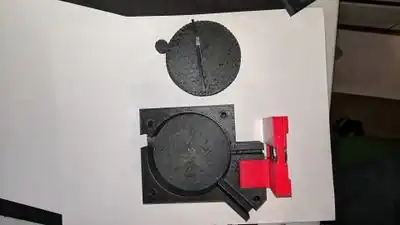
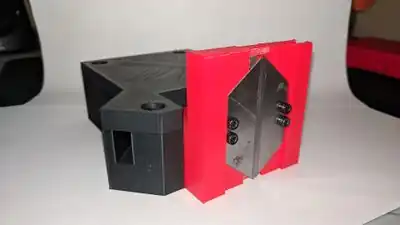
- Place the slit assembly with the body assembly, this should be a tight fit. See picture below for alignment.
- Place the Body Cover over the whole assembly lining up the holes.
10. Secure with M3 25mm screws
How To Use/Adjust
- Place a light source at the opening, preferably a single white LED source.
- Wavelengths can be adjusted by moving the small gear located in the rear of the assembly.
- Slit thickness can be adjusted by tightening or loosening the M3 25mm screw located on the side of the slit assembly.
Common Problems and Solutions
Shattering CD - When cutting the CD to size, be sure to use a fresh blade and carefully cut using a straight edge till all the way through the CD.
Reflective Surface - When cutting be careful, reflective surface may flack off or peel. If it occurs cut a new section.
Cost savings
Cost of Production
$0.37 - Gear A + B
$0.22 - Light Slit Left
$0.13 - Light Slit Right
$0.70 - Body Cover
$0.99 - Body
$0.31 - Blank CD
$0.20 - 2x Box Cutter Blade
$0.52 - M3 8mm Screw
$0.47 - M3 25mm Screw
$0.20 - 2x Pen Spring
Total = $4.11
Commercial Equivalent
Edmund Optics - Mini Chrom (Specific Range): $1500
Savings
Mini Chrom Comparison - 364.96%
Standard Edition Comparison ($5000) - 1217%
Benefited Internet Communities
Gathering for Open Science Hardware (GOSH) - - A movement that seeks to reduce barriers between diverse creators and users of scientific tools to support the pursuit and growth of knowledge.
Spiderwort - - A open source group that has released several scientific designs and continues to develop open source kits that could be used in schools, labs and garages.
Open-Labware - - A community that focues on consumer-oriented 3D printers based off the "maker movement" pushing for prototypes of complex products in owns own garage.
PhysicsOpenLab - - A physics based community that openly shares designs for scientific equipment for people to make at home.
SciencetoyMaker - - Focuses on making cheap fun science based toys for children which makes learning fun.
References
- Monochromators Wiki Available: https://en.wikipedia.org/wiki/Monochromator.html
- Shimadzu Corportaion - Monochromators Fundamentals Available: https://www.shimadzu.com/an/uv/support/fundamentals/monochromators.html#2
- Castor Classes Youtube.com - Monochromator Video Available: https://www.youtube.com/watch?v=87-omb2tSv8 .