Tibial Shaft Simulator
This data-driven, gender-specific, easy to print, environmentally friendly, hygienic, and cruelty-free simulator can be locally made to provide the highest fidelity orthopedic surgical simulation training at the lowest cost in resource-constrained settings.
Materials and Equipment
3D Printed Tibial Bone Model #3 with Bicortical Anatomy and Cancellous Bone Microstructure
- Fused Deposition Modelling 3D Printer (on-site access to a 3D printer and materials is not required)
- White Polylactic Acid (PLA) Filament
- STL Files for 3D Printed Adult Male or Female Tibial Bone Models #3
Soft Tissue Layer for Plunge Depth Measurement
- Modelling Clay
- Cellophane
- Depth Gauge
- Airtight Storage Container or Resealable Bag (to prevent clay from drying out to permit reuse)
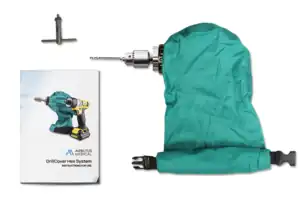
Powered Orthopedic Surgical Drill and 4.0 mm Drill Bit
Any powered orthopedic surgical drill that is compatible with 4.0 mm drill bits can be used.
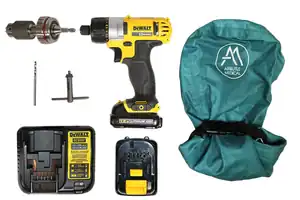
The Arbutus Medical HEX Drill Kit uses autoclavable drill covers to permit faster turnaround on reprocessing orthopedic surgical drills in resource-constrained settings.[1]
Each Arbutus Medical HEX Drill Kit contains aː
- 3-Jaw Chuck Adapter
- Modified DeWalt Drill
- DrillCover Hex Linen
- Chuck Key
- Battery Charger
- Rechargeable Lithium-Ion Battery
- Storage Bag (not shown)
The Arbutus Medical HEX Drill Kit does not include drill bits so the learner must obtain 4.0 mm drill bits separately.
Miscellaneous Supplies
- Vise Clamp
- Eye Protection
- Gloves
- 4.5 mm Combination Drill Sleeve
- Syringe
- Water (to simulate sterile normal saline)
- Shallow Container (to collect irrigation solution)
- Training Logbook
Assembly Instructions
Set Up Tibial Shaft Simulator
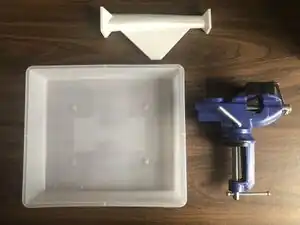
You will need the following materials:
- 3D Printed Tibial Bone Model #3
- Shallow Container
- Vise Clamp
- Table
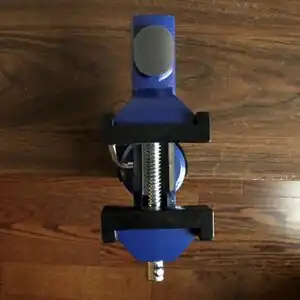
- Secure one Vise Clamp to a flat, stable surface.
- Open the jaws of the Vise Clamp to permit insertion of 3D Printed Tibial Bone Model #3.
- Identify the threaded screw that connects the jaws of the Vise Clamp.
- Identify the semi-engraved drilling direction arrow on the base of 3D Printed Tibial Bone Model #3.
- Orient 3D Printed Tibial Bone Model #3 in the Vise Clamp so the drilling direction arrow is pointing in a right-to-left direction.

- Place Model #3 inside the Vise Clamp.
- To maximize stability, (i) the model vise attachment should be centered and rest on the threaded screw that connects the jaws of the vise clamp, and (ii) the model vise attachment should be well secured between the tightly closed jaws of the vise clamp.
- Place the shallow container on the floor to collect the irrigation solution during bicortical drilling skills training.
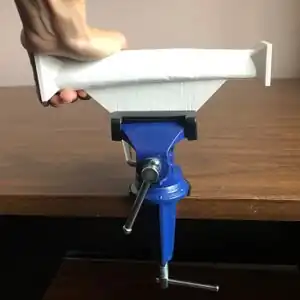
- Check the stability of the model by pushing down on the top of the left and right ends of the model.
- If the model drops down, check and reposition the vise attachment over the threaded screw inside the body of the vise clamp (if needed) and be sure to clamp the jaws together more tightly.
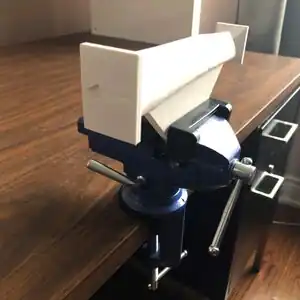
- Check the orientation of the 3D Printed Tibial Bone Model #3 by identifying the semi-engraved drilling direction arrow on the base of Model #3.
- If the arrow is not pointing in a right-to-left direction, remove and re-orient the 3D Printed Tibial Bone Model #3 so the drilling direction arrow is pointing in a right-to-left direction.
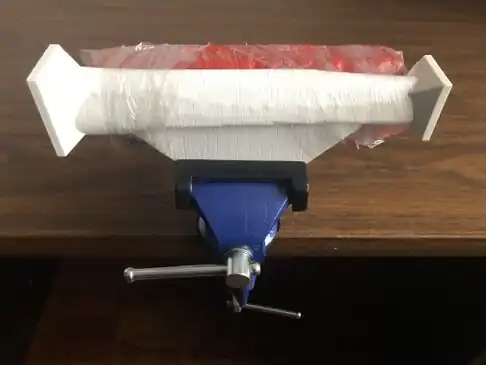
Add the Clay Backstop for Recording Plunge Depth
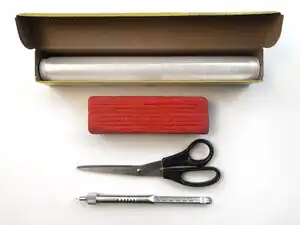
You will need the following materials:
- Cellophane
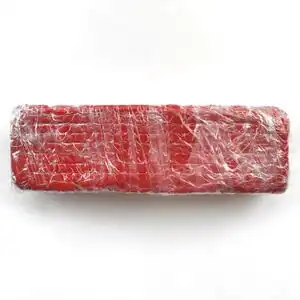
- Modelling Clay
- Scissors
- Depth Gauge
Not shown in imageː
- Tibial Shaft Simulator
- Cut cellophane into long strips that are about 6.0 cm wide.
- Wrap the cellophane around the entire clay backstop.
Wrap one layer of a 6.0 cm wide long cellophane strip tightly around the clay backstop and 3D Printed Tibial Bone Model #3 to secure the clay backstop up against the lateral side of the 3D Printed Tibial Bone Model #3 so the clay is well molded against the far cortex.[2]
Assemble the Powered Surgical Drill
You will need the following materials:
- Orthopedic Surgical Drill
- 4.0 mm Drill Bit
- 4.5 mm Drill Sleeve (not shown in image)
- Follow the drill manufacturer's instructions to assemble the orthopedic surgical drill and insert a 4.0 mm drill bit.
Final Preparations for Skills Training
- Download and print the Training Logbook.
Acknowledgements
This work is funded by a grant from the Intuitive Foundation. Any research, findings, conclusions, or recommendations expressed in this work are those of the author(s), and not of the Intuitive Foundation.
References
- ↑ Arbutus Medical. Hex Drill Kit - Orthopedic Surgical Drill [Internet]. Arbutus Medical. Arbutus Medical; 2021 [cited 2021 Nov 28]. Available from: https://arbutusmedical.com/drillcover-hex/.
- ↑ John A. Ruder, Blake Turvey, Joseph R. Hsu, Brian P. Scannell, Effectiveness of a Low-Cost Drilling Module in Orthopaedic Surgical Simulation, Journal of Surgical Education, Volume 74, Issue 3, 2017, Pages 471-476, ISSN 1931-7204, https://doi.org/10.1016/j.jsurg.2016.10.010.